Easy Homemade Toothpaste For Kids

 
Easy Homemade Toothpaste
 

I am a big fan of tooth powder, it is easy to make and store indefinitely, I love how clean my teeth feel after I use it. My kids, however, do not love tooth powder. “It’s too scratchy!” or “Too Spicy!” We have been using Earthpaste for years and as much as I love that toothpaste, I get that nagging feeling I get whenever I buy a store bought cosmetic: I KNOW I can make it myself and for way less money. I decided we were going to start making our own toothpaste and I let my kids take the lead in coming up with the recipe. I gave them the basic ingredients, while they chose the flavors they liked best.

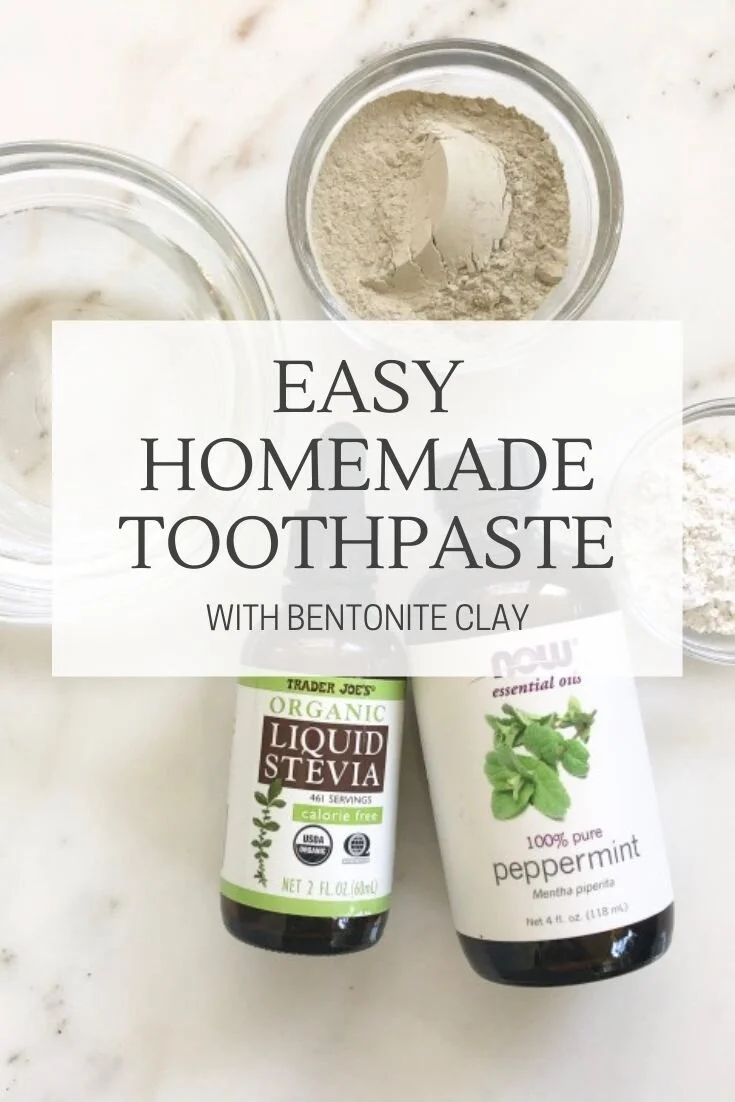
How to Make Homemade Toothpaste with Bentonite Clay

The best part of our ingredient cabinet is we have almost everything we need on hand for new experiments. I brought out the following ingredients and let the kids play around: 

Bentonite Clay – Formed from volcanic ash, this clay is rich in minerals and has shown incredible healing and antibacterial properties.

Calcium Carbonate – Typically made from shells (egg, or seashells). Calcium is important to formation of healthy teeth.

Essential Oils – When using essential oils internally, it is important to do your research. We use peppermint essential oil for our toothpaste, but if your child is under 6, I recommend reading up on dilution rates and what oils are safe for your child. There is lots of conflicting info on essential oils out there. Use your best judgement and contact your doctor if you have concerns. As an alternative to essential oils we often use spices (like cinnamon) or tea bags to flavor our toothpaste.  

Stevia – A natural, herbal way to sweeten. A little bit goes a long way! Needless to say, this is the kid’s favorite ingredient.

Water – Filtered water, since our city has fluoride in tap water and fluoride is one of the things we are trying to avoid!

Making toothpaste is by far my kids favorite thing to make from scratch. My oldest ask me recently if making toothpaste could be one of his chores, um…yes please!

Does Homemade Toothpaste Cure Cavities?

I have seen lots of articles online about toothpaste healing cavities, but from my experience and research, cavities are a result of what we put in our bodies, not what we put on our teeth. Ramiel Nagel in his book Cure Tooth Decay does a great job going into the reasons cavities form and the focus on a nutrient dense diet as an actual cure for cavities. He summarizes the work of Weston A. Price and other dentists who have found that brushing alone cannot cure tooth decay. 

“When dentist Percy Howe tried to inoculate bacteria into guinea pigs to cause tooth decay or gum disease, he could not. He could only cause cavities with a change in diet.”[1]

When it comes to my family’s experience with cavities we have had great success using a nutrient dense diet and brushing with homemade toothpaste. While dealing with some autoimmune conditions, I decided to start myself and my children on the Autoimmune Protocol, a nutrient dense elimination diet. This diet had such a huge impact on my family’s health, healing all of my son’s eczema symptoms and our digestive issues. Around the time we started this diet, we found out my son had a smooth surface cavity. It was such a disappointment, but since I knew we were eating the right foods I felt confident that it wasn’t necessary to treat right away. Three years later, we went back to the dentist and he couldn’t find the cavity!

Our teeth absorb minerals in our saliva. When we brush with a mineral rich toothpaste, we provide more minerals for our teeth to absorb, giving them an added boost, but still not a cure for a poor diet.  

Author:
Homemade Toothpaste with Bentonite Clay

Homemade Toothpaste with Bentonite Clay

Prep time: 10 MinTotal time: 10 Min

Ingredients

Instructions

  1. In a small bowl combine the water, and calcium until combined. Slowly sprinkle clay into the water while stirring to break up clumps. Add essential oil (or spices) and stevia to taste. Transfer to a small glass jar for storage. Dip your toothbrush into the jar to cover the brush with the paste.
  2. The clay can become very clumpy and difficult to stir, just add water until it is smooth. Your toothpaste should be thick enough to easily stay on your brush. The clay will continue to thicken a bit for at least an hour after mixing with water. If it seems a little too wet, let it sit for a bit.
  3. Play around with your recipe and let me know how it goes!
Did you make this recipe?
Tag @thehomecraft on instagram and hashtag it #diytoothpaste
Created using The Recipes Generator


[1] Nagel, Ramiel. Cure Tooth Decay: Heal And Prevent Cavities With Nutrition - Limit And Avoid Dental Surgery and Fluoride [Second Edition] 5 Stars. Rami Nagel. Kindle Edition.

Disclaimer: I am not a medical professional. I do my own research and enjoy sharing what I have learn here and I encourage you to do your own research and talk to a doctor you trust before making changes to your diet and lifestyle.

The Amazon links through this site are affiliate links and help to pay for the hosting of this site. Thanks for supporting The Home Craft!

I Wash My Face With Clay

 
CLAY FACE WASH
 

I don’t use soap on my face. After battling years of acne in high school, I realized that the more I washed my face, the worse things got. I eventually gave up and stopped washing my face altogether. The wild thing is, my skin got better when I stopped washing. What I didn’t know then was I was stripping my skin of the bacteria and oil that naturally protected it, causing major breakouts.

Human skin has a natural PH of around 5 or lower, using soap, cosmetics and in some cases even city tap water, can disrupt that PH, brining it to more alkaline levels. When we disturb the acid mantle of our skin the bacteria that thrive in the higher PH environment stop thriving and leave our skin vulnerable to infection, breakouts, and dry skin.

How Often To Use Kaolin Clay Wash

I still don’t wash my face every day, but I do use clay at least 3 times a week and my favorite being Kaolin Clay. This clay has a PH of about 5-6 and does not disturb your skin’s acid mantle. I let the clay sit on my face for 1-2 minutes. It dries so quickly, if you wait any longer it will start to flake off of your skin, leaving a dusting of clay everywhere. As it dries I can see my pores soaking up the clay. I wipe the clay off of my face with a warm washcloth. I often need to go over my face with the cloth two or three times to get the clay out of my pores and remove all the dead skin cells. The difference before and after is impressive! My face feels smooth, polished and my pores are much less visible.

The days I don’t wash my face with clay, I use the Oil Cleansing Method or a Bentonite Clay & ACV mask. On days I don’t wear makeup, I will often skip washing my face altogether and my skin is still super happy!

I usually like to keep things simple and use the kaolin on its own, but sometimes I feel fancy and add essential oils (lavender to soothe, frankincense for rejuvenating/healing).

Have you ever tried kaolin clay? How do you keep your skin happy?

 
Kaolin Clay Facewash
 
Author:
2 Minute DIY Kaolin Clay Mask

2 Minute DIY Kaolin Clay Mask

Ingredients

Instructions

  1. Fill a small wide mouthed jar with the clay. 
  2. Wet a cotton ball, dab it in the clay and spread across your face. 
  3. Let the clay sit on your face for 1-2 minutes. (It dries so quickly, if you wait any longer it will start to flake off of your skin, leaving a dusting of clay everywhere.)
  4. Wipe the clay off of your face with a warm washcloth. 

Notes:

You may need a few tries to fully remove the clay from your pores. Follow with an oil wash if the clay is being particularly stubborn.

Did you make this recipe?
Tag @thehomecraft on instagram and hashtag it #CRACKers
Created using The Recipes Generator

Make Your Own Eyeshadow with Spices, Clays and Minerals

 
Spice Shadow.jpg
 

If you know me well, you know that I'm not a huge fan the caked-on makeup look. In high school I pretty much never wore makeup, except for once or twice a year, eliciting many shocked and excited comments from friends, especially my mother, when I did. The older I've gotten, the more frequently I wear makeup, but often stick to just mascara and some lip tint. Going shopping at Sephora or any makeup counter, has always been sensory overload for me. Smells and colors and people trying to put things on me...it is not my happy place. That's not to say I don't like the idea of makeup, I actually think it can be really fun to play around with. This time of year there seem to be more reasons to get dressed up and make my face sparkly.   

About 10 years ago I found a recipe online for a homemade face powder and it just so happened I had all the ingredients I needed on hand. The results were pretty great and since that time I have continued to create my own recipes for makeup. The results aren't always perfect and I have had to toss many a failure on the compost pile, but my most recent project I have been really happy with. The first time I made eyeshadow I was experimenting with inorganic pigments, mainly iron oxides. The colors were vibrant and beautiful and I really enjoyed using them. You can be very precise when color matching with inorganic pigments, however not *everyone* has a sample set of iron oxides sitting around the house. I am willing to bet that if you are reading this post, you probably have some cinnamon, cacao and maybe some turmeric in your spice cabinet right now.

Using spices and clays to make eyeshadows are not only convenient, but I feel SO much better about what I'm putting on my face. The ingredients found in common eyeshadows can be pretty nasty: aluminum, coal tar, formaldehyde and parabens, just to name a few. There are also a few companies that use nanoparticles in their mineral makeup. Nanoparticles can enter your bloodstream and accumulate in your body, not something we should expect to happen with makeup. The color from most cosmetic products come from iron oxides. Oxides are generally considered safe and the EWG considers them a low risk. That being said, the process of making pigments from oxides in a laboratory is pretty involved this video gives you an idea of how they are made. I found myself wanting something more accessible that has hopefully gone though less processing.

While lots of companies are starting to change their products due to public pressure, one way to make sure you know what is in your eyeshadow is to make it yourself!


Ingredients

Most of the ingredients I use in these recipes are easy to acquire (especially with the internet) if you don't already have them in your kitchen. 

Gold Mica Dust - Mica is a mineral that adds a bit of sparkle to your eyeshadow. When mica is wet ground it is like a fine glitter dust. A little goes a long way! 

Sericite Mica - Sericite Mica is an incredibly fine mineral that works to help the color adhere to your skin. It also helps to spread the color evenly. 

Beetroot Powder - For pinks and reds. You can purchase (or grow!) your own beets, slice, dehydrate and grind your own powder. Or pick some powder up at your local health food store. I like the Starwest Botanicals brand. Color will vary.

Cinnamon - Not only does it smell good, but it is a lovely warming color. 

Spirulina Powder - A blue-green alge that has numerous health benefits, also is an incredibly vibrant color of green. 

Turmeric - Another powerhouse spice that is amazing internally and externally. Add just a pinch for bright golden yellow. 

Cacao Powder - Cacao adds a light brown color and smells wonderful. 

Allspice - When I want a darker brown, allspice adds a nice depth of color. 

Activated Charcoal - Black. I've been using activated charcoal for years as an eyeliner. It makes a beautifully smokey shadow as well. 

Hibiscus Powder - Reds, pinks and purples. Hibiscus is high in vitamin c and great internally and externally. You can buy dried hibiscus flowers and grind them yourself or buy the powder ready to go. 


Tips and Tricks

Hibiscus eyeshadow dusted and hibiscus sparkle liner

Hibiscus eyeshadow dusted and hibiscus sparkle liner

When using spices for makeup, the effects will be more subtle then store bought products. While adding ingredients like mica help with adhesion and application, they are going to be more understated applied directly. If you are a fan of of the natural look, these recipes will be great on their own. If you would prefer a bolder look, here are some tricks you can use:

Moisturize Well. Applying oil or lotion to your eyelids will help the powder to stay put and adhere better. I like using argan oil. 

Arrowroot Powder. If you really want to show off the color, dusting your eyelid with arrowroot first will give you a good base.

Add Water. For a really clear line, you can wet your brush with a bit of water, dip in the eyeshadow. You can also use this trick with an eyeliner brush to turn your eyeshadow into a liner. 

Aloe Vera. Similar to water, you can use aloe vera juice on your brush to make a little paste with the colors and apply as a liner or eyeshadow. 

Concealer. By adding concealer to your eyelid you can make a nice clean palate to work with. Concealer recipe coming soon!


Activated charcoal eyeliner and smokey shadow

Activated charcoal eyeliner and smokey shadow

As you can tell from the pictures...I am not a makeup artist! I just mess around with techniques until I like what I see. 

Just a note on tools: in the recipes I mention the measurements dash, smidgen, tad, and drop. These are clearly non standard measurements! They come from my favorite tiny measuring spoons. When measuring using such small amounts, it really helps to have a uniform measuring spoon. If you don't have these spoons, just wing it! A tad is about 1/4 teaspoon, a dash is less than that, then a pinch, then a smidgen, then a drop. When you want to get really serious about homemade makeup we can talk about scales and spice grinders, but that will have to be another day. 

I should probably mention brushes as well. When you apply your shadow to a brush as loose powder, tap the end of your brush upside down on the counter before you apply. This will help the powder to set into the brush and help you avoid getting loose powder all over your face. All of these recipes can be used as eyeliners as well. A straight angled brush is a great tool for lining your eye and can work wet or dry. 

Have fun experimenting and don't be shy to make it up as you go!


Homemade Eyeshadow Recipes

Before you get started you want to get set up with a few tools: Small mixing bowls, a small whisk, measuring spoons, mini funnels (or roll a paper funnel), tiny measuring spoons (for all the dashes, smidgens, drops and tads you see below) and a small container to store your powder (old eyeshadow containers that have been sterilized work great!). Who doesn't love working with all these miniature tools?!

Precaution: You want to avoid breathing in the powders, as you are mixing by hand that should be pretty easy. If you want to be extra cautions you can use a dust mask while working. 

 Whisk all of the ingredients together and pour into your jar using a funnel.   

Deep Green

1/2 tsp Spirulina Powder

Pinch Gold Mica Dust

Tad Sericite Mica


Dusk/Mauve

1/4 tsp Beetroot Powder

Dash Cinnamon

Dash Sericite Mica

Drop of Gold Mica Dust (Optional)


Golden Brown

1/4 tsp Cinnamon

Dash Turmeric

Dash Sericite Mica

Drop of Gold Mica Dust (Optional)


Smokey

1/4 tsp Cacao Powder

1/4 tsp Allspice

Pinch Activated Charcoal

Dash Sericite Mica

Drop of Gold Mica Dust (Optional)


Hibiscus Sparkle

1/2 tsp Hibiscus Powder 

1/4 tsp Sericite Mica

Drop of Gold Mica Dust 


These recipes are just a place for you to start. Play around with the colors and come up with your own combinations! Make sure to take notes so you can replicate if you like the results! And don't forget to come back and let me know what worked for you!

Disclaimer: I am not a medical professional. I do my own research and enjoy sharing what I have learn here and I encourage you to do your own research and talk to a doctor you trust before making changes to your diet and lifestyle.

The Amazon links through this site are affiliate links and help to pay for the hosting of this site. Thanks for supporting The Home Craft!

Fermented Rice Water Hair Rinse

 
RICE WATER RINSE.jpg
 

Have you heard of the Hualong village in China where the ladies only cut their hair once in their life? Pictures of these women show up in Facebook articles every so often where they mention they have made it into the Guinness Book of world records for longest hair. Their hair is 6 to 7 feet long, it is thick, shiny and dark. They also say that the women don't start going grey until they are in their 80s. Their secret for beautiful hair is said to be rinsing their hair with the water leftover from rinsing rice. 

This article on Hair Buddha gives a great explanation of why rice water works. In her article she mentions SK-II has a skin care product called Pitera. SK-II say they were inspired to create Pitera based on the hands of older sake workers, which would appear smooth and youthful in contrast to their wrinkled faces. The Birth of Sake is a documentary currently on Netflix and I re-watched in recently paying particular attention to their hands. It is remarkable how compared to the faces of the older workers, their hands were smooth and wrinkle free. 

 
rice water rinse and jar
 
rice-water-hair-rinse-results

A few years ago I decided to go "no-poo" and detox my hair from my daily shampoo and conditioner routine. I did the baking soda wash and vinegar rinse and tried a few variations. None of them were really my favorite. When I found Morrocco Method shampoos I was so happy to find a non stripping formulation with raw ingredients. My hair had reset and no longer needed daily washing. However...Morrocco Method, due to it's cost is more of a treat to me, once a year I will order a set and enjoy spa like showers for a few months. When I'm out of Morrocco Method I use a shampoo from Rudy's Barbershop (this product does not meet my standards of not putting on your body what you wouldn't put in your mouth, but compared to most store bought brands I prefer it), thankfully since my scalp detox I don't have to wash every day. Once or twice a week works great. My hair routine does not include using conditioner. I have tried many different conditioners, most of them leaving my hair feeling film, oily or just contributed to the build up of product that needed to be stripped. 

When I tried the rice water for the first time it was better than some of nicest conditioners I have used. My hair was so soft after using it and it did an amazing job of detangling. Considering that it was so incredibly easy to make and it is basically free, I'm honestly not sure if I'll ever buy conditioner again.

Another benefit of soaking your rice overnight is that you will have rice that cooks quicker and is also easier to digest. In Nourishing Traditions, Sally Fallon talks quite a bit about soaking grains

Traditional societies usually soak or ferment their grains before eating them, processes that neutralize phytates and enzyme inhibitors and, in effect, predigest grains so that all their nutrients are more available. Sprouting, overnight soaking and old-fashioned sour leavening can accomplish this important predigestion process in our own kitchens.[1]

Lovely hair and more nutritious rice. Win Win!


Author:
Fermented Rice Water Hair Rinse

Fermented Rice Water Hair Rinse

Ingredients

Instructions

  1. Thoroughly rinse your rice before adding to the two cups of water.
  2. Cover and let sit overnight or at least 12 hours. 
  3. Use a fine strainer to remove the rice, pouring the rice water into a bottle (I love these squeeze bottles) or jar. 
  4. Shampoo hair as usual and rinse. 
  5. Pour rice water over hair and let sit for 3-4 minutes. 
  6. Rinse hair with warm water and dry as usual.

Notes:

If you do not plan to use right away you can refrigerate for a day or two (but let it come to room temperature unless you want an extremely cold rinse!). If you have longer hair, you can use a separate cup and place the ends of your hair directly in the rice water. You can capture the rice water in the cup as you pour the water from the bottle over your hair for complete coverage.

Did you make this recipe?
Tag @thehomecraft on instagram and hashtag it #CRACKers
Created using The Recipes Generator


Have you ever tried rice water for your hair? Let me know what you think in the comments!


[1] Fallon, Sally; Enig, Mary. Nourishing Traditions:  The Cookbook that Challenges Politically Correct Nutrition and the Diet Dictocrats (p. 25). National Book Network - A. Kindle Edition.:

Disclaimer: I am not a medical professional. I do my own research and enjoy sharing what I have learn here and I encourage you to do your own research and talk to a doctor you trust before making changes to your diet and lifestyle.

The Amazon links through this site are affiliate links and help to pay for the hosting of this site. Thanks for supporting The Home Craft!

Why I Use Magnesium Oil for Deodorant

DIY Magnesium Oil Lavender Deodorant

Body odor can be so embarrassing. I can think of plenty of times I have have found myself avoiding human contact because I felt self conscious about my smell. I love the feeling of sweating out toxins after a hard workout, but I do NOT love the smell that can often come along with it.

How you smell can be an indicator of a mineral deficiency, not a deodorant deficiency.

Similar to toothpaste, according to the FDA, deodorants and antiperspirants fall into the category of “Cosmetics That Are Also Drugs”[1]. You have probably heard by now about the dangers of aluminum in antiperspirants and their possible link to breast cancer. In this article, Chris Kresser looks at the research and finds the links are not quite so clear, but says that there IS clear evidence that aluminum can be absorbed into breast tissue and that shaving greatly increases the absorption of aluminum. He goes on to say that:

“Estrogen plays a key role in the development of breast cancer, and one study demonstrated that aluminum can interact with estrogen receptors on human breast cancer cells…There is also speculation that the blockage of sweat glands caused by aluminum-based antiperspirants could lead to the dermal absorption of abnormal levels of sex hormones and pheromones, which could contribute to cancer development.”

While today aluminum seems to be more of a contributing factor to breast cancer than a direct cause, there is a very clear link between aluminum and Alzheimer’s disease. Aluminum is the most abundant neurotoxic metal on earth. Very little aluminum is needed to produce neurotoxicity and small amounts over time accumulate in the brain[2]

The first product that came up in my search for deodorant on Amazon lists the following ingredients:

Ingredients

Active: Aluminum Chlorohydrate. Inactive: Cyclopentasiloxane, Isopropyl Palmitate, Stearyl Alcohol, Mineral Oil, Talc, Hydrogenated Castor Oil, Fragrance (Parfum), Steareth-100, BHT.

The EWG labels the risks of Cyclopentasiloxane as the following: Other HIGH concerns: Persistence and bioaccumulation; Other MODERATE concerns: Organ system toxicity (non-reproductive); Other LOW concerns: Ecotoxicology, Endocrine disruption, Neurotoxicity[3]

The three types of alcohol in the ingredients above, while considered to be of low concern by the Environmental Working Group all disrupt the bacteria of your underarms. By stripping the good and the bad bacteria it leaves your underarms defenseless against harmful bacteria. A study done on the on the microbiome of the underarm recently found that people who do not use deodorant or antiperspirants that had the highest amount of Corynebacteria bacteria, which is responsible for some bad smells, but also helps to defend against pathogens. Staphylococcaceae (one of the most common microbes found on our skin) was the next most common and are considered to be beneficial as well.

Why Magnesium?

It is incredibly difficult to get adequate levels of magnesium in our diet due to our depleted soil even if you are eating a real food diet. While you can take a supplement internally the best method for optimal absorption is transdermal (through your skin) via salt baths, gels, lotions or oil. Magnesium oil is my favorite of these options for daily use. One warning however: if you are deficient in magnesium, when you first apply the oil it can sting. Try spraying a small amount first in an area that is not super sensitive and won’t be rubbing against fabric for your first time.

When I bought my first bottle of magnesium oil and sprayed it on my lower back to relieve cramping…it burned! I moved to spraying my forearms until the stinging stopped, about 2 days (It didn’t sting the entire 2 days! Just for a bit after application). Then I moved to spraying under my arms and found myself free of stink! I didn’t even realize how well it was working until it ran out. I could go without it (using my back up crystal deodorant) if I had a low activity day, but I found that if I drank coffee, particularly more than one cup, the stink would be back strong. That all made sense when I found out that while coffee and chocolate contain high amounts of magnesium, caffeine actually depletes our magnesium stores.

Sally Fallon writes in Nourishing Traditions that low levels of magnesium is one of the causes of heart disease and goes on to say that magnesium “is essential for enzyme activity, calcium and potassium uptake, nerve transmission, bone formation and metabolism of carbohydrates and minerals. It is magnesium, not calcium, that helps form hard tooth enamel, resistant to decay. Like calcium and chloride, magnesium also plays a role in regulating the acid-alkaline balance in the body. High magnesium levels in drinking water have been linked to resistance to heart disease.”[4]

Sarah Ballantyne, PHD and author of The Paleo Approach says in her book that magnesium “is important for neuromuscular contractions, and is necessary in the production of testosterone and progesterone...Magnesium is also a cofactor in methylation and is necessary for detoxification functions… Higher levels of dietary magnesium have also been correlated with decreased systemic inflammation in postmenopausal women."[5]

Katie over at Wellness Mama has written a lot about magnesium, I highly recommend you check out her articles, especially this one on magnesium deficiency.  


Magnesium Oil Deodorant


1 bottle of Magnesium Oil

(optional) ½ tsp of Essential Oils

If you choose to add an essential oil (I like adding lavender), pour oils directly into spray bottle, or choose a smaller spray bottle, like an old hand sanitizer spray bottle and add just a few drops of oil. Apply to underarms after showering. 

[4] Fallon, Sally; Enig, Mary. Nourishing Traditions:  The Cookbook that Challenges Politically Correct Nutrition and the Diet Dictocrats (p. 42). National Book Network - A. Kindle Edition.

[5] Ballantyne, Sarah. The Paleo Approach: Reverse Autoimmune Disease, Heal Your Body (Kindle Locations 2423-2427). Victory Belt Publishing. Kindle Edition.


Disclaimer: I am not a medical professional. I do my own research and enjoy sharing what I have learn here and I encourage you to do your own research and talk to a doctor you trust before making changes to your diet and lifestyle.

The Amazon links through this site are affiliate links and help to pay for the hosting of this site. Thanks for supporting The Home Craft!